Monday, March 28, 2011

DIY: Passport Photos

Everyone knows that traveling is expensive. And sometimes, all the little details you have to take care of before you even GET anywhere can really add up!

Passport photos are ridiculously expensive. For two tiny 2x2 pictures, the going rate is between $12 and $15, and they are usually just about as good as your driver's license photo. Nice.

Here is a little tutorial if you need a passport photo and you want to take them yourself.

1.) Go to this site and check out the official requirements for a US Passport photo. The list is long, but don't let this deter you!

2.) Use your digital camera, and take a picture against a white or off-white background (ie. closet door, blank wall, hang a sheet) of the person from the chest up and leave plenty of space above their head. If possible, use natural light (no flash) from a window to avoid shadows on the face or behind the head.

This is definitely not Seth's normal smile, but it was his best attempt at a "neutral expression". I should have saved some of the others. They ranged anywhere from a serious scowl to a deliriously giddy smile.


Some of the most important requirements to remember, especially when photographing kids, are to have their shoulders squared to you with them looking straight towards the camera. No head tilt, neutral expression, and both ears must be showing. Think mug shot... :-)

3.) Now take your picture, and upload it to ePassportPhoto.com
It is really user friendly, takes you through things step by step, and helps you crop your picture to the exact specifications for a passport photo. There is only one tricky step - after you are satisfied with your picture, it takes you to a page where you seemingly have to buy prints of your photos through the mail with them. I almost quit at this point, because they had advertised they were completely free, but then I looked down in the bottom corner and there is small link that says "no thanks". Click that, and you can download your rescaled photos for free!

This is how they come out looking (they are sized to be printed as 4x6's):


After downloading these to my computer, I simply sent them to the 1-hour Photo Center at Target and got two copies of each and my grand total was $ .80! For very minimal effort on my part, I saved money AND the hassle of taking both my kids to a photo shop to get the pictures taken. Sometimes it is totally worth it to D.I.Y.

Tuesday, March 15, 2011

Simple Gallery Wall

I recently made some simple updates in our bedroom. We have lived in this house for 9 + years, and we have never had a headboard for our master bedroom. My sister gave us her old one years ago, and it has been sitting in our storage shed all this time waiting to be painted.

I finally got around to painting it this past weekend. (Unfortunately I forgot to take a before picture...bummer!)


The night stands were also a bargain find about 6 months ago.


I knew I wanted to use the
chalkboard I painted a few months back above the bed. We also had some miscellaneous black frames around the house that we weren't using anymore. I laid them all out on the bed and spent some time trying different arrangements.

Once I came up with an arrangement I liked, I measured the total arrangement and figured out where it should be centered above the headboard. I did a few markings on the wall and started hanging!


The two photographs in the corners are ones that Steve took in California, and they used to be hanging in his office. I loved that they both have a lot of blue in them. Now I just have to figure out what to put in those 5 blank spaces! (Click on any image to see a larger version.)


This was an especially fun project because it was absolutely *FREE*! I used what I had at home, and we were so happy with how it turned out.

Saturday, March 12, 2011

The Difference a Door Can Make

This post has two purposes...to show how much a new back door changed our whole living/kitchen area, and also confess to the embarrassingly slow progress we have made in our kitchen project.

Always start with the positive I say!

The glass is indeed half full!

I didn't take the time for great before and after photos, but I found this one that shows the old door.


This was taken on the day that
Steve and Jeremy were sanding the kitchen cabinets. January 26th to be exact.

We have always called this our Napoleon Dynamite door. Doesn't it look like it belongs in his house? Another friend, Jeff, recently christened it the Long John Silver's door. I haven't been in a Long John Silver's since I was about 8, so I will just have to trust him on that one.

All this to say, we did not like the door much. I mean, a lot of cool stuff came out of the 60's, but this door was not one of them. We actually bought a replacement door on clearance approximately 2 years ago. Give or take...but who's counting?

A very skilled friend blessed us big time by installing the door and a new screen door this week. We had no idea the difference it would really make, especially in the amount of natural light it lets in.

BEFORE:


AFTER:


A couple comments about this picture:

1. Look at the light, the beautiful natural light pouring in!! Love it.

2. Yes, there is always a guitar hanging out on various pieces of furniture.

3. I still need to paint the wood moulding around the new door a crisp white.

4. Yes, it is March 12th and there are no cabinet doors on our kitchen cabinets. Which means that, in approximately a week and a half, it will have been 2 months since we began this little kitchen project.

Who would have thought we wouldn't be finished by now?? Please, no comments on that one necessary. :-)

We have run into a few "snags", the main one being the countertops. Lets just say the first go round on painting our laminate countertops did not end well. I actually took pictures during the (l-o-n-g) process, but I could not bring myself to blog about it. It was too painful. Way too many hours. Wasted. Oh my my.

And we both felt like the white paint we chose for the cabinets was too white, so I am waiting to get the countertops finished before getting the white paint tweaked at the paint store. Then I can put another coat on the cabinets and paint the doors. The doors have at least been primed!!

Maybe the shame of writing this post will produce a little fire of motivation to get things moving towards completion during Spring Break. Or maybe we will just go out and play in the beautiful weather with the boys and learn to live without kitchen cabinet doors.

Maybe...

Monday, March 7, 2011

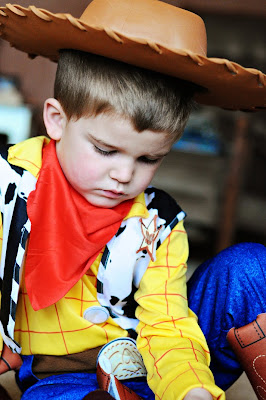
Sheriff Woody

Oh....I mean, Sheriff Caleb!


We were watching one of the Toy Story movies, and Caleb ran to get his Buzz Lightyear costume. But alas, it was not in the bag. We searched high and low, to no avail, and he had to settle for Sheriff Woody this time. It is Seth's costume, so we had to roll up the sleeves and pant legs, but he was pretty pleased once we got it on!


He likes to wear the hat sideways, so it looks more like a sombrero... :-).


I love to see this smile!


Wednesday, March 2, 2011

Caleb the Greeter

I went to observe Caleb's preschool class. He was "The Greeter" on this particular day. For someone who has had his fair share of struggles with speech and language, he was a rock star!


First, the teacher says (into the microphone, how cool is that?!?) "Good morning, Caleb!" Then he says good morning back to her.


Then he went around the circle and said good morning to each of his classmates by name, and then held the microphone down to them so they could say good morning back.


It was pretty darn cute to hear fourteen little 4 year old voices greeting Caleb, but I have to admit one 4 year old's little voice was the sweetest one to my ears!